Showing posts with label Animals. Show all posts

Monday, 20 July 2015

Giraffe Nails

This evening I painted a giraffe design on my clients nails. It was inspired by a design she found online where the giraffes neck is stretched across all of the nails with the face on the thumb. There are a few variations on this design that other nail artists have created so you could look on google for similar ideas if you like this design! It is a fairly simple design to paint as all you need is a blue base polish and yellow, brown and black nail art pens. If you don't have nail art pens in those colours you can just use normal nail polish with a nail art brush. The blue polish I used was Can't Find My Czechbook by OPI, the yellow and black were nail art pens from Wah London and I used a brown polish by Barry M with a nail art brush to draw the giraffe print.


If you live in Beverley and want to book a manicure with me you can see my price list here.

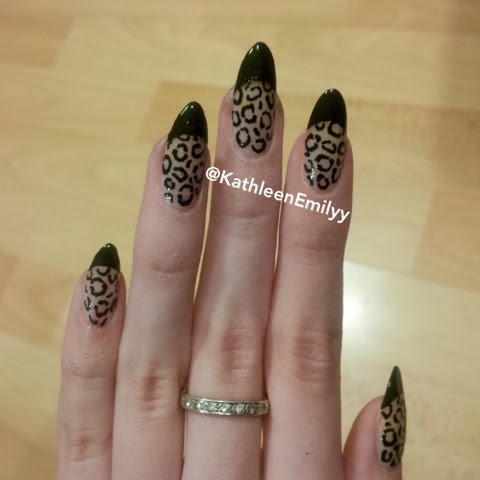
If you like my work you can follow me on Twitter and Instagram @KathleenEmilyy

Sunday, 15 February 2015

French Leopard

I  came up with this nail design because I wanted to try out a black French manicure. I think French tips look very classy but for me they are a bit plain and boring so I wanted to make it more fun by adding some leopard print. The base colour I used is OPI's Bubble Bath - a pale pink/nude colour that is normally used for regular pink and white French manicures. I drew the leopard print using a black Wah Nails nail art pen and I painted the black tips with Nails Inc's New York Noir. This design would also look good on round or square shaped nails they don't have to be pointed like mine!

How to get this look:

Start by applying a base coat and then a coat of pink or nude polish.

Draw the leopard print using a black nail art pen working from the bottom of the nail up and stop when you get to the top of the nail where the French tip will be. Leopard print is really easy to draw once you get the hang of it - try drawing C's and broken circles and then go back and make the lines thicker and more uneven so they look like leopard spots.

If there are empty gaps around and between your leopard spots fill the space in with black dots or short squiggles.

When you have covered the bottom of your nail in leopard print use a black nail polish to draw the French tips. You draw a French tip by painting across the nail horizontally starting at one side and moving across to the other side; if the line is not quite straight you can do a second stroke in the opposite direction to even it out and create a smooth line across the nail. The French tip should just cover the top of some of your leopard spots so you will be left with some half spots disappearing under the tip.

Finish off by applying a top coat.

Sunday, 25 January 2015

Butterfly Wings

These are my butterfly wing nails. They are inspired by a design I saw painted by Wah Nails which is a nail art salon in London which I love! I have just got some new Wah nail art pens so this is my first time testing them out. For the base colour I used a shiny pink OPI Polish called A-Rose By Dawn Broke By Noon. This design looks great with a glittery or shiny polish as the base colour and it looks good with different colour combinations if you're not a fan of pink. I would recommend the Wah Nails art pens, they have a fairly fine tip so you are able to draw intricate lines and they have a thin striper brush inside.  They are good quality nail art pens compared to other brands I have tried and the polish inside them gives good coverage. 

How to get this look:

Start with a base coat and then apply two coats of shiny pink polish.

Now using a black nail art pen, draw a thin black outline right around the edge of the nail on every side.

Then in the centre of the left side draw three lines spreading outwards until they reach the right side of the nail (one line straight across the middle one below and one above.)

Once you have the basic lines you slowly fill in more black so you leave a rounded shape in each pink section, try to create a tear drop shape. So you should be left with four pink tear drop shapes on the nail, if your black outline is not neat or you have over outlined you can use a wooden cuticle stick to gently push back the black line to make it look smoother and neat.

When you are happy with the shapes use a white nail art pen or a dotting tool to draw spots on the black parts of the nail. You can do different size dots and different patterns on each nail they don't all have to be the same.

Finish by applying a top coat.

Wednesday, 3 December 2014

Sparkly Snowflake Nails

These are my winter nails with a sparkly blue base, snowflakes and two of my favourite animals, a penguin and polar bear. The polishes I used were OPI's 'Can't find my Czechbook' as a blue base colour and then two coats of Nails Inc's 'Fitzroy Square' which is a blue glitter polish.

How to get this look: Here I will explain how to draw snowflakes on your nails. As always start with a base coat and then apply a coat of blue colour and then a glittery polish over the top. Wait a few minutes for your nails to dry as glitter polishes can be quite sticky. Draw a white X on your nails and then in each of the four spaces of the X draw a shorter white line. Go back and draw V shapes on the X and then on the shorter lines. Repeat this on every nail by drawing different sizes of snowflakes and you can vary the shapes by drawing different amounts of lines.

Tuesday, 14 October 2014

Victorias Secret Pink Nails

These are my Pink Victorias Secret themed nails. I saw this design on a picture by MissJenFabulous and loved the idea so I created my own version.

How to get this look:

Apply a base coat and then paint three nails white, one pink and one silver.

Put another glitter polish over the silver polish to make it extra sparkly.

Create a pink ombré on the thumb using a makeup sponge and draw the dog, heart and 'pink' lettering with a black nail art pen.

To make the leopard print paint random dots in different colours on the nail and then draw broken circles around them with a black nail art pen.

Finish by applying a top coat.


Wednesday, 10 September 2014

Hello Kitty Nails

These are my Hello Kitty nails, a simple design for anyone who loves Hello Kitty. The base colour I used is OPI's Alpine Snow and the black nail art pen I used was from Models Own. 

How to get this look:

Apply a base coat and then two coats of your white polish (or more if necessary - some white polishes are not very opaque.)

Use a nail art pen to draw the black outline of Hello Kitty's head and bow.

Add the eyes and whiskers with your black nail art pen, then add a yellow nose and fill in the bow with your colour of choice, I used a glitter pink.

Draw the Hello Kitty lettering on your other nails with your black nail art pen, you should practice the lettering first so it looks like the font used for the logo.

Finish by applying a top coat to protect your cute kitty nails.


Thursday, 31 July 2014

How To Train Your Dragon Nails

I went to see How To Train Your Dragon 2 at the cinema recently and loved it! So I decided to paint the dragons from the movie on my nails. The base colour I used on my nails is OPI's Bubble Bath - a natural looking base colour like this is best for this design to make sure all the colours from the dragons stand out really well.

How to get this look: 

Apply the base colour on all of your nails and then paint the face shape of each dragon in the suitable colour.

After painting all the base colours for the dragons you can go back and start adding details. As you will be layering lots of colours on top of each other you should work on each nail a bit at a time and move on to the next nail while each layer of polish dries.

For the 'Toothless' nail (the black dragon) I used nail polish remover on a wooden stick to remove the black polish where I would be painting the eyes, this was so I could use a green base and then a green glitter polish to make the eyes really bright and shiny.

All the dragons detailing was drawn with nail art pens.

To finish off let your nails dry for a while to avoid smudging and then apply a top coat.