Thursday, 8 October 2015

Fall Out Boy Tour Nails

I went to see Fall Out Boy perform in Leeds last weekend. They were absolutely amazing live and I loved every second! Of course I had to create a nail art design for the occasion so I painted my nails using the artwork from their latest album (American Beauty American Psycho) as my theme.

The base colour I used was Alpine Snow by OPI and the design was drawn on using a Wah London black nail art pen.

If you recreate this design make sure you dab the top coat on rather than dragging the brush across the nail because the black lines will smudge very easily on a white background.

Alternatively, this design would have looked great with a black base polish and the design drawn on with a white nail art pen. If anyone tries it out with a black background make sure you send me a pic @KathleenEmilyy on Twitter and Instagram, I would love to see your designs!

I previously did another Fall Out Boy nail art design using some of their older album covers as inspiration. You can see the blog post about it here.


Sunday, 27 September 2015

Nail HQ Hydrating Primer Review

I have been trying out another Nail HQ product this week. This time I tried their 'Hydrating Primer' which you apply on your nail before any colour or base coat. The primer cleanses the nail ready for the polish application and it also contains ingredients which are nourishing for the nails to keep them hydrated and healthy.


Using a primer before your base coat ensures that the nail is clean, this means that the polish will bond to your nail more effectively to prevent peeling and flaking. The primer also helps to hydrate the nail before you apply your polish which means your nails won't feel as dry and damaged when you take your polish off.

I have just been using this primer with regular nail polish but it is also suitable for use with artificial nails. I would definitely recommend using a primer like this before applying artificial nails because these are more likely to cause damage. Using this primer would prepare your nails nicely and leave a nourishing layer to protect your natural nails from whatever you apply on top of them.

This product retails at around £6.99 which is a great price for a good quality primer that you can use for every manicure. The bottle will last you ages so it is definitely worth it and from now on I shall be including it as an essential step in my manicure routine as preparing and nourishing the nail before a manicure is very important!

I love all of Nail HQs treatments and I would also really recommend their top coat! You can check out their other products here: http://www.nailhq.co.uk

Have you tried any Nail HQ products yet? Let me know @KathleenEmilyy on Twitter and Instagram and +Nail Art by KathleenEmilyy on Google+.

Saturday, 12 September 2015

Fuse Gelnamel Starter Kit Review

Fuse Gelnamel is a one step gel nail polish which combines the convenience of regular nail polish and the quick drying, chip free effects of gel polish. The starter kit includes one bottle of nail polish, a mini LED lamp, cleanser, lint free wipes, a cuticle stick and a buffer. They have managed to fit a lot of useful kit into a tiny box so I think this would make a cute little gift for anyone who enjoys painting their nails! 


To use the kit you must prepare your nails by pushing back your cuticles, buffing the surface of your nail and then using the cleanser and a lint free wipe to clean the nail. After preparing the nail, all you have to do is apply a thin coat of Fuse Gelnamel to the nail and cure under the LED lamp for 30 seconds and repeat this on all 10 fingers.

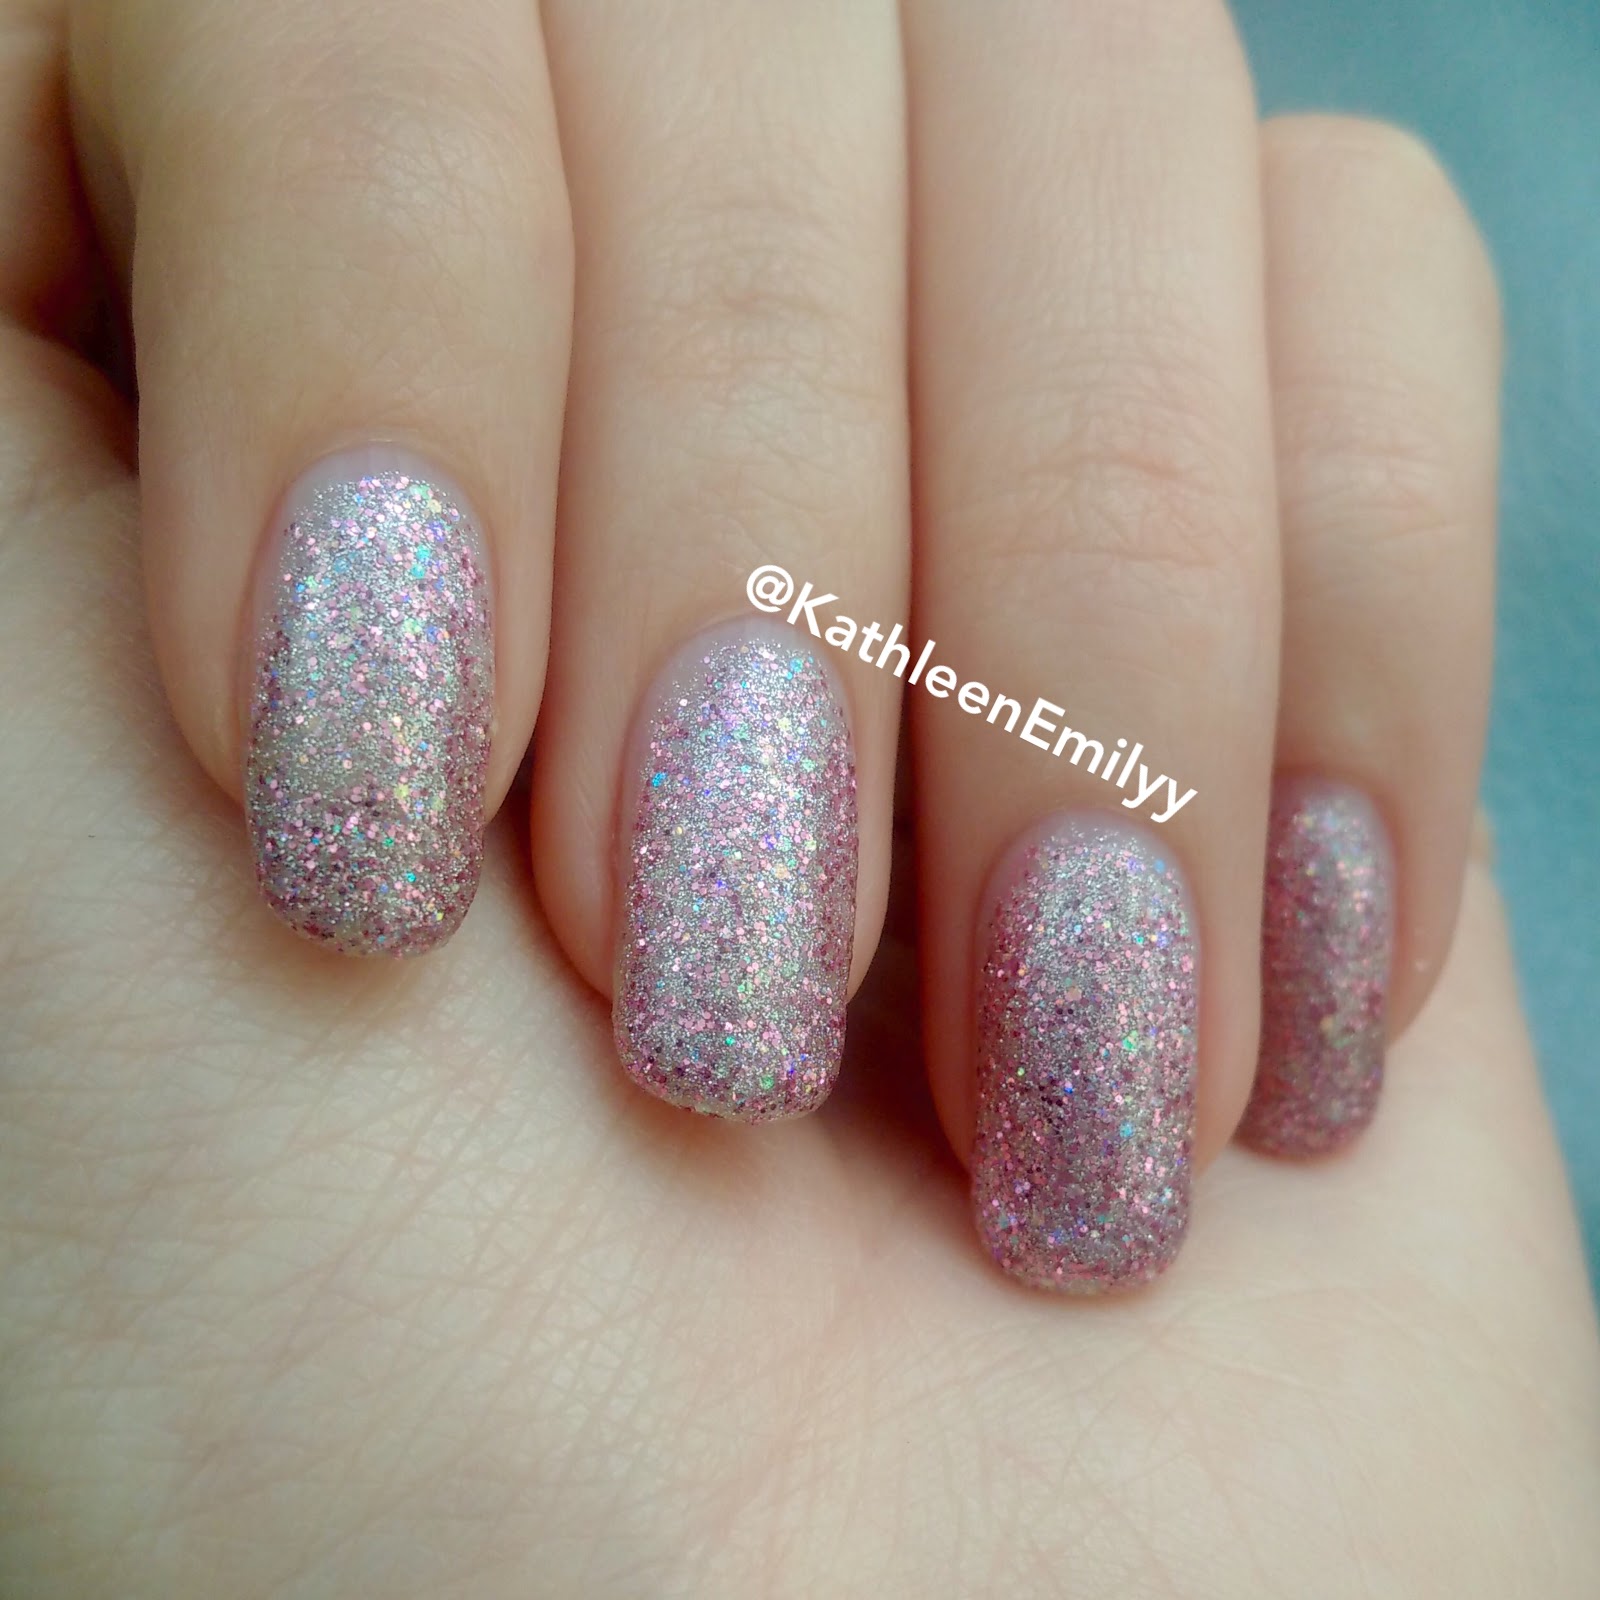
This polish does not require a gel base or top coat and claims that you only need one coat of polish which makes application a lot faster than a full gel manicure. I did find that the glitter polish that came in my starter set did require more than one coat to fully cover the nail. You must cure the nail under the LED lamp between each coat and you have to apply the polish in very thin layers. After the first coat it left a sheer coating of glitter, the second coat was acceptable, however I prefer full glitter coverage so I applied three coats just to be sure.


The application process was fairly quick but because the lamp is so tiny you have to complete all steps on one nail and then cure before moving onto the next. However, I found it easy enough to start preparing the next nail while the last nail is curing inside the lamp so it wasn't much of an inconvenience for me.

The colour of the actual polish is lovely, it has a combination of silver glitter with bigger pieces of pink glitter so overall it gives a soft pastel pink look. I thought that the polish would leave a rough surface on my nail as there was no top coat to smooth over the glitter but my nails actually feel very smooth and glossy so you really don't need a top coat!


Overall, I do really like this product and I will definitely use it again when I need a quick gel manicure. If you buy this product expecting the results of a salon gel manicure then you will probably be dissappointed because without a base and top coat you won't get the full strength for chip free resistance. However the Gelnamel polish is certainly stronger than regular nail polish so if you want something that lasts a bit longer but can't afford a salon manicure this would definitely suit you. I also love that the LED lamp is so small because that means you could fit it in any bag which makes it great for travelling and taking on holiday.

You can buy the Fuse Gelnamel starter kit from Boots by clicking here.

Have you tried the Fuse Gelnamel kit yet? Follow me on Twitter and Instagram @KathleenEmilyy and let me know what you think!

Sunday, 30 August 2015

Red Leopard Print

This red leopard print design was painted on a clients nails yesterday. The red base polish I used for this design is 'Love My Team' by Wah London. It is a lovely bold shade of red and the polish gives great coverage.

To draw the leopard print design I used a black nail art pen by Wah London. If you don't have a nail art pen you can use any black polish with a fine nail art brush to paint on the leopard spots.

This design works well on short nails as it is a simple pattern to draw but also looks great on longer nails too. You can choose any colour you like for the base polish and if desired you can use a second colour to fill the middle of the leopard spots.

As always, be careful when you apply the top coat so you don't smudge the black design - it is best to dab the brush on to the nail rather than drag the brush across.


Thursday, 6 August 2015

Lilac Crystals

I've been trying out some more nail art designs with gel polish so this week I'm sharing one of my crystal gel nails designs. The pastel lilac gel polish is a beautiful colour for spring and summer and looks great with both silver and purple coloured crystals. The silver crystals I used are Swarovski crystals and the purple crystals I used are generic plastic crystals which you can get from any nail art supplier. The Swarovski crystals are a lot more sparkly and shiny than the cheaper crystals so I would definitely recommend getting some if it's within your price range. I always keep my Swarovski crystals when I soak off my manicure as you can re-use them again!


Using crystals to create nail art designs is a very simple technique but offers a wide range of potential styles. You can place a single crystal on each nail for a subtle and elegant look or you can cover your whole nail in crystals for a glam sparkly look. I decided to create a pattern on my ring finger with different colours and sizes of crystals for a super sparkly manicure great for a party or special occasion. When applying crystals to your nails with gel polish I find it is best to secure them in place within two layers of top coat. I apply the crystals on to the first layer of top coat when it is still wet and then cure under the lamp to set them in place. I then apply another layer of top coat over the whole nail and over the crystals before curing it under the lamp again. Some people prefer to skip the second layer of top coat to keep the crystals more sparkly but they will start falling off much sooner and the amount of shine that they lose with the top coat is not noticeable enough to worry about.

I'd love to see some other people's crystal nail designs so send me your manicure pics @KathleenEmilyy on Twitter and Instagram!

Monday, 20 July 2015

Giraffe Nails

This evening I painted a giraffe design on my clients nails. It was inspired by a design she found online where the giraffes neck is stretched across all of the nails with the face on the thumb. There are a few variations on this design that other nail artists have created so you could look on google for similar ideas if you like this design! It is a fairly simple design to paint as all you need is a blue base polish and yellow, brown and black nail art pens. If you don't have nail art pens in those colours you can just use normal nail polish with a nail art brush. The blue polish I used was Can't Find My Czechbook by OPI, the yellow and black were nail art pens from Wah London and I used a brown polish by Barry M with a nail art brush to draw the giraffe print.


If you live in Beverley and want to book a manicure with me you can see my price list here.

If you like my work you can follow me on Twitter and Instagram @KathleenEmilyy

Thursday, 2 July 2015

Strawberries and Cream

Wimbledon started this week and everyone eats strawberries and cream when they go to watch the tennis competition so I decided to paint strawberries on my nails. The women's final is on Saturday 11th of July and the men's final is on Sunday 12th of July so hopefully I can last a couple of weeks without chipping my polish!

If you're not into the Wimbledon theme and you just like the strawberries you can do this design without the splashes of cream for a cute nail design - the strawberry design also looks good on your toes if you want a fancy summer pedicure design.


(Strawberries & Cream glass bowl is from Emma Bridgewater)

How to get this look:

Start by applying a base coat and then two coats of red nail polish.

Using a nail art brush and green polish paint the strawberry leaves at the base of your nails next to your cuticles.

Next paint the splashes of cream using a white polish. I did this using the normal brush from your white polish by smoothly moving across the nail to create drippy shapes and then going back and doing a second coat to make the white polish opaque. If you don't have a steady hand you can use a nail art pen or a thin brush to draw a wavy line across the nail and then fill in the tip with white polish.

Finish off the strawberries by using a yellow nail art pen or a fine nail art brush to draw rows of seeds across the nails.

Apply top coat by dabbing the brush onto the nail. Don't drag the brush across your nail or the red polish will smudge onto the white tips.


Let me know if you like this design or have any design requests by messaging me @KathleenEmilyy on Twitter and Instagram.

Thursday, 25 June 2015

Palm Trees

I love wearing brightly coloured nail polish in the summer so this week I wanted to do a nail art design with a bright coloured gradient. I decided to put palm trees over the colour gradient to give it a summer holiday feel so it looks like a sunset on a tropical beach. 

I used four colours and a makeup sponge to create the gradient base. The pink polish is Strawberry Margarita by OPI, the coral polish is Access All Areas by Ciaté, the orange polish is Speed Dial by Ciaté and I don't actually have a yellow bottle of polish so I used the polish from my Wah London yellow nail art pen. I drew the palm trees using my black Wah London nail art pen.

The best way to create a gradient like this with four colours is to start with a white base polish. Use the rectangle end of your makeup sponge and draw a stripe across it with each polish so you have four different coloured stripes on your sponge. Then lightly keep dabbing the sponge onto your nail until the colour gradient transfers onto your nail. If it is too light just apply more polish to the sponge and dab again. Draw on your palm trees using a black nail art pen and don't forget to add a big yellow sun setting behind one of the trees!


Let me know if you like this design or if you have any design requests by messaging me @KathleenEmilyy on Twitter and Instagram!

Sunday, 21 June 2015

Swarovski Pedicure

A few years ago I had a Swarovski crystal pedicure done for my birthday. I absolutely loved it and I've been wanting to get it re-done ever since. Now I am qualified in gel nails I decided to give it a go myself.

I used a whole pack of Swarovski crystals from Charlie's Nail Art - they cost £1.25 for a pack of 100 crystals. If you are looking for crystals or other nail art supplies I would recommend this website because their prices are great and all the supplies I've used from there have been good quality. 

The crystals are super sparkly in the sunlight so this pedicure is great for the summer when you will be wearing sandals all the time. It would also be great for special occasions like weddings and looks really glamorous with a pair of matching sparkly shoes.

I will soon be offering Swarovski Pedicures as a treatment for my mobile nail clients in Beverley, so let me know if you are interested!


You can follow me on Instagram and Twitter @KathleenEmilyy 

Thursday, 11 June 2015

Colour Changing Nail Polish

I went on a gel nails training course this week so I can start doing gel manicures on my mobile nail clients. I have been using gel polishes from Blue Sky - this is a fairly cheap brand of gel polish but it is good to practice with while you are learning. I will be investing in some more expensive gel polishes to use on clients but for now I have been having fun with Blue Sky's colour changing polishes from their Chameleon range. 

I was skeptical when I purchased this polish because I have read reviews of colour changing polishes before which said they were rubbish and hardly changed colour. I was amazed with this polish because it works great and it changes colour all the time when I am wearing it. In the bottle the polish is a dark purple colour but when it is applied on your nails it either turns bright pink when it is warm or dark purple when it is cold. I find that most of the time throughout the day it creates a great ombré effect between pink at the cuticle and purple at the free edge of the nail. 

I have created a video of the gel polish below which shows it changing colour in hot and cold water:


I'd love some gel polish brand and colour recommendations so let me know your favourite gel polish colour @KathleenEmilyy on Twitter and Instagram.

Thursday, 4 June 2015

Ciaté Orange Choc Pot Review

Ciaté have got some new chocolate scented nail polish remover pots. You can choose from: dark choc, mint choc, orange choc and white choc. Today I am reviewing the Orange Choc Pot nail polish remover.


I really like using nail polish remover pots because they are quick and easy to use - you just dip your fingers in the pot one at a time and twist them on the sponge to remove your polish. They are really useful if you are travelling as they are small and compact and you don't have to worry about spilling a whole bottle of liquid nail polish remover in your bag.

When you open the Ciaté Orange Choc Pot and smell it, it does have a very strong chemical smell which doesn't really resemble chocolate orange. But smell your hands after you have used it and it does leave a lovely orangey chocolate smell on your fingers.

It took about 5-10 seconds to remove the nail polish off each finger. It was a very speedy process to remove the polish and it definitely worked quicker than any other brand of remover pots I have tried. I was surprised at how dry the sponge felt at first as most other pots I have tried have a very wet sponge but this did not seem to be an issue as it removed my polish perfectly.

I really like the Orange Choc Pot and I would love to find out what the other pots smell like. You can buy the nail polish removers from Ciaté's website here. If you have tried out any of the other chocolate scents let me know what you think and send me a message @KathleenEmilyy on Twitter and Instagram.

Sunday, 31 May 2015

Pink Hearts

I created this design using striping tape and a nail art stamp for the hearts. The stamping plate and rubber stamper I used were from MoYou. Their stamping sets are good quality and easy to use so I would recommend this brand if you have never used a nail art stamp before. Also, if you are not familiar with striping tape it is very thin tape that you put on your nails as a guide to create bold straight lines - it can be bought from any nail art supplier.

(I apologise for my random short thumb nail in the first photo... I had an accident last week and broke it, oops!)


How to get this look:

Start by applying a base coat and allow this to dry.

Place two pieces of string tape on your nail starting at the nail bed and moving inwards towards the middle of your nail to create a triangle shape. Repeat this on every nail.

Paint two coats of white polish inside the striping tape - don't worry if you paint over the tape as you will be removing the tape later.

Using pink polish paint onto your heart stamping plate, remove the excess polish with the scraper and then pick up the design with the rubber stamper and apply this to your nail over the white triangle. Repeat the stamping process on every nail.

Next, paint two coats of the pink polish from the striping tape to the ends of your nails.

Use tweezers to peel the striping tape off every nail.

Using a pink glitter polish and a fine nail art brush, paint a line of glitter where the striping tape was so your triangles are outlined with glitter.

Finish by applying a top coat.


If you try out this design send me a pic @KathleenEmilyy on Twitter and Instagram.

Sunday, 24 May 2015

Pastel Galaxy

I love nail art designs where different colours are faded and blended together using a makeup sponge. I was really bad at using the makeup sponge technique the first time I tried it so I have been practicing it a lot recently to try and perfect it. One of my favourite designs that you can create with a makeup sponge is Galaxy nails that look like the starry night sky. I have seen loads of people try this design so I decided to try it out myself but using pastel colours. The main three colours I used were all from Wah London:- the pastel blue is called An Even Bigger Splash, the lilac is called Mating Surfaces and the pink is called No Nails No Life. The purple glitter polish I used is called Moon Walking from Rimmel Londons space dust collection.


How to get this look:

Apply a base coat and two coats of white nail polish.

Apply a dot of blue nail polish onto a makeup sponge and dab it on the nail leaving a few patches of blue with spaces of white in between where the other colours will go. 

Repeat this step with lilac and then pink nail polish so that the white base is fully covered.

Go back with just the blue and the lilac and apply another layer of these colours with the sponge to give better colour coverage. Dab the sponge lightly where the different colours meet so that they are blended evenly and fade into each other.

Apply a dot of purple glitter polish onto the makeup sponge and dab this onto your nail where you applied the lilac polish.

Use a white nail art pen to draw stars and dots on your nails and make sure they are in different positions on each nail.

Finish by applying a top coat.


If you try out this design send me a photo @KathleenEmilyy on Twitter and Instagram.


Wednesday, 20 May 2015

Nail Wheel

Now I have passed my driving test I am working as a mobile nail technician in the Beverley area of East Yorkshire. I have painted some of my favourite designs on to a nail wheel to help my clients choose how they want their nails doing. 

I wanted to share my nail wheel in a blog post so you can see more of my work. Let me know which design you like the best and if you want me to do a tutorial for any of these designs. You can comment on the post or find me on Twitter and Instagram @KathleenEmilyy 


Wednesday, 13 May 2015

Ombré Nails

I like doing ombré nails as it is a really quick and easy nail art design. All you need is two different nail polish colours and a makeup sponge. The base colour I used was Strawberry Margarita by OPI and to create the ombré colour fade I used an orangey/coral coloured polish. You can use any two colours to create a colour fade as long as they aren't too similar or it won't show up very well. Use two bright colours like the pink and orange in my design for a subtle colour fade or use a bright colour and a pastel colour together to create a more startling ombré effect.


How to get this look:

Apply a base coat

Apply two coats of your chosen base colour (I usually use the darker of the two colours as the base - I used pink as my base here)

Allow your nails to dry for a few minutes

Apply a dot of your second nail polish colour onto a makeup sponge and then dab the sponge on to the tip of your nail moving up to the middle of the nail leaving less colour as you get closer to the middle to create a fading effect. Keep applying more polish to the sponge when it stops leaving colour on the nail.

Using your sponge go back and dab another layer of polish on to the tips so your second colour is fully covering the tip and then gradually fades out towards the middle of the nail.

Finish by applying a top coat


If you try out ombré nails yourself tag me in your pics @KathleenEmilyy on Twitter and Instagram - I would love to see the different colour combinations you can come up with!

Thursday, 7 May 2015

Poppy Nails

This is a design I painted today with poppy flowers. The base colour I used was My Boyfriend Scales Walls by OPI which is an off white and the red polish for the poppies was Love My Team from Wah London.


How to get this look:

Apply a base coat and then two coats of white polish.

Draw the poppies with a nail art brush by painting four V shapes in a circle with the point of the V's at the centre. This creates your four petals - fill in each V with red polish so you have a full poppy flower.

Using a lighter shade of red polish apply a dot of polish to a sponge and then dab on the centre of each poppy to give it a two tone effect.

Using a black nail art pen or dotting tool draw lots of small black dots in the middle of each poppy.

With green nail polish and a nail art brush draw wavy lines coming out from each poppy.

Finish by applying a top coat.

Wednesday, 6 May 2015

Nail HQ Review

I have been trying out some nail products from Nail HQ - a British nail care brand. The products I am trying out are: Protect and Repair treatment, Hardener and Gel Top Coat. 


Gel Top Coat
I have tried so many top coats over the years and nothing ever compares to high end brands like OPI but with this top coat I was pleasantly surprised by the quality. It feels very smooth when you apply it and always coats the nail evenly. It's important that I keep my nail art chip free for as long as possible so to really test the strength of the top coat I put some Swarovski crystals on my nails which were held in place only by the top coat - no nail glue! I was amazed to find that my nails lasted 5 days before I lost a crystal or got any chips in the polish. I would definitely recommend using this top coat as it is very strong and looks really nice and glossy when it is dry.

Hardener
The hardener is designed to strengthen thin and weak nails and should prevent brittle and splitting nails. I have been using the hardener as a base under my coloured polish to improve the strength of my nails and also to help my coloured polish last longer. I feel like the hardener has improved the strength of my nails because my nails usually split very easily at the tips and I have not noticed this happen as much recently. Because I am constantly wearing nail polish it is really important for me to use treatments like this to improve the condition of my nails and I will definitely be using this one again.

Protect & Repair
This is a treatment designed to hydrate, moisturise and condition nails and is recommended for use after wearing acrylic or gel nails. I gave this treatment to my mum to try out as her nails are quite weak and could do with a conditioning treatment. You apply the treatment every day for five days like a regular nail polish and then remove it with nail polish remover and start the process again. She really liked the product and said it made her nails feel healthier and in better condition. She liked how quickly it dried and it looks like you are wearing clear nail polish so it gives your nails a nice shiny but natural look. The only bad point she noticed is that when doing things like washing dishes the treatment chipped off on the tips but if you wear rubber gloves when cleaning you shouldn't have this problem.

There are lots more Nail HQ treatments for different nail problems which I would love to try in the future. Their products are available at Tesco and Amazon - let me know if you try any of them out!

Sunday, 3 May 2015

The Deep

Todays nail art inspiration came from my trip to The Deep - an aquarium in Hull. I have been meaning to visit since they opened their new Gentoo penguin exhibition so today we went for a trip. I had a great time espescially as we got to see the Penguins diving and swimming underwater. It's a great day out and a must see place if you are visiting the Hull or East Yorkshire area.


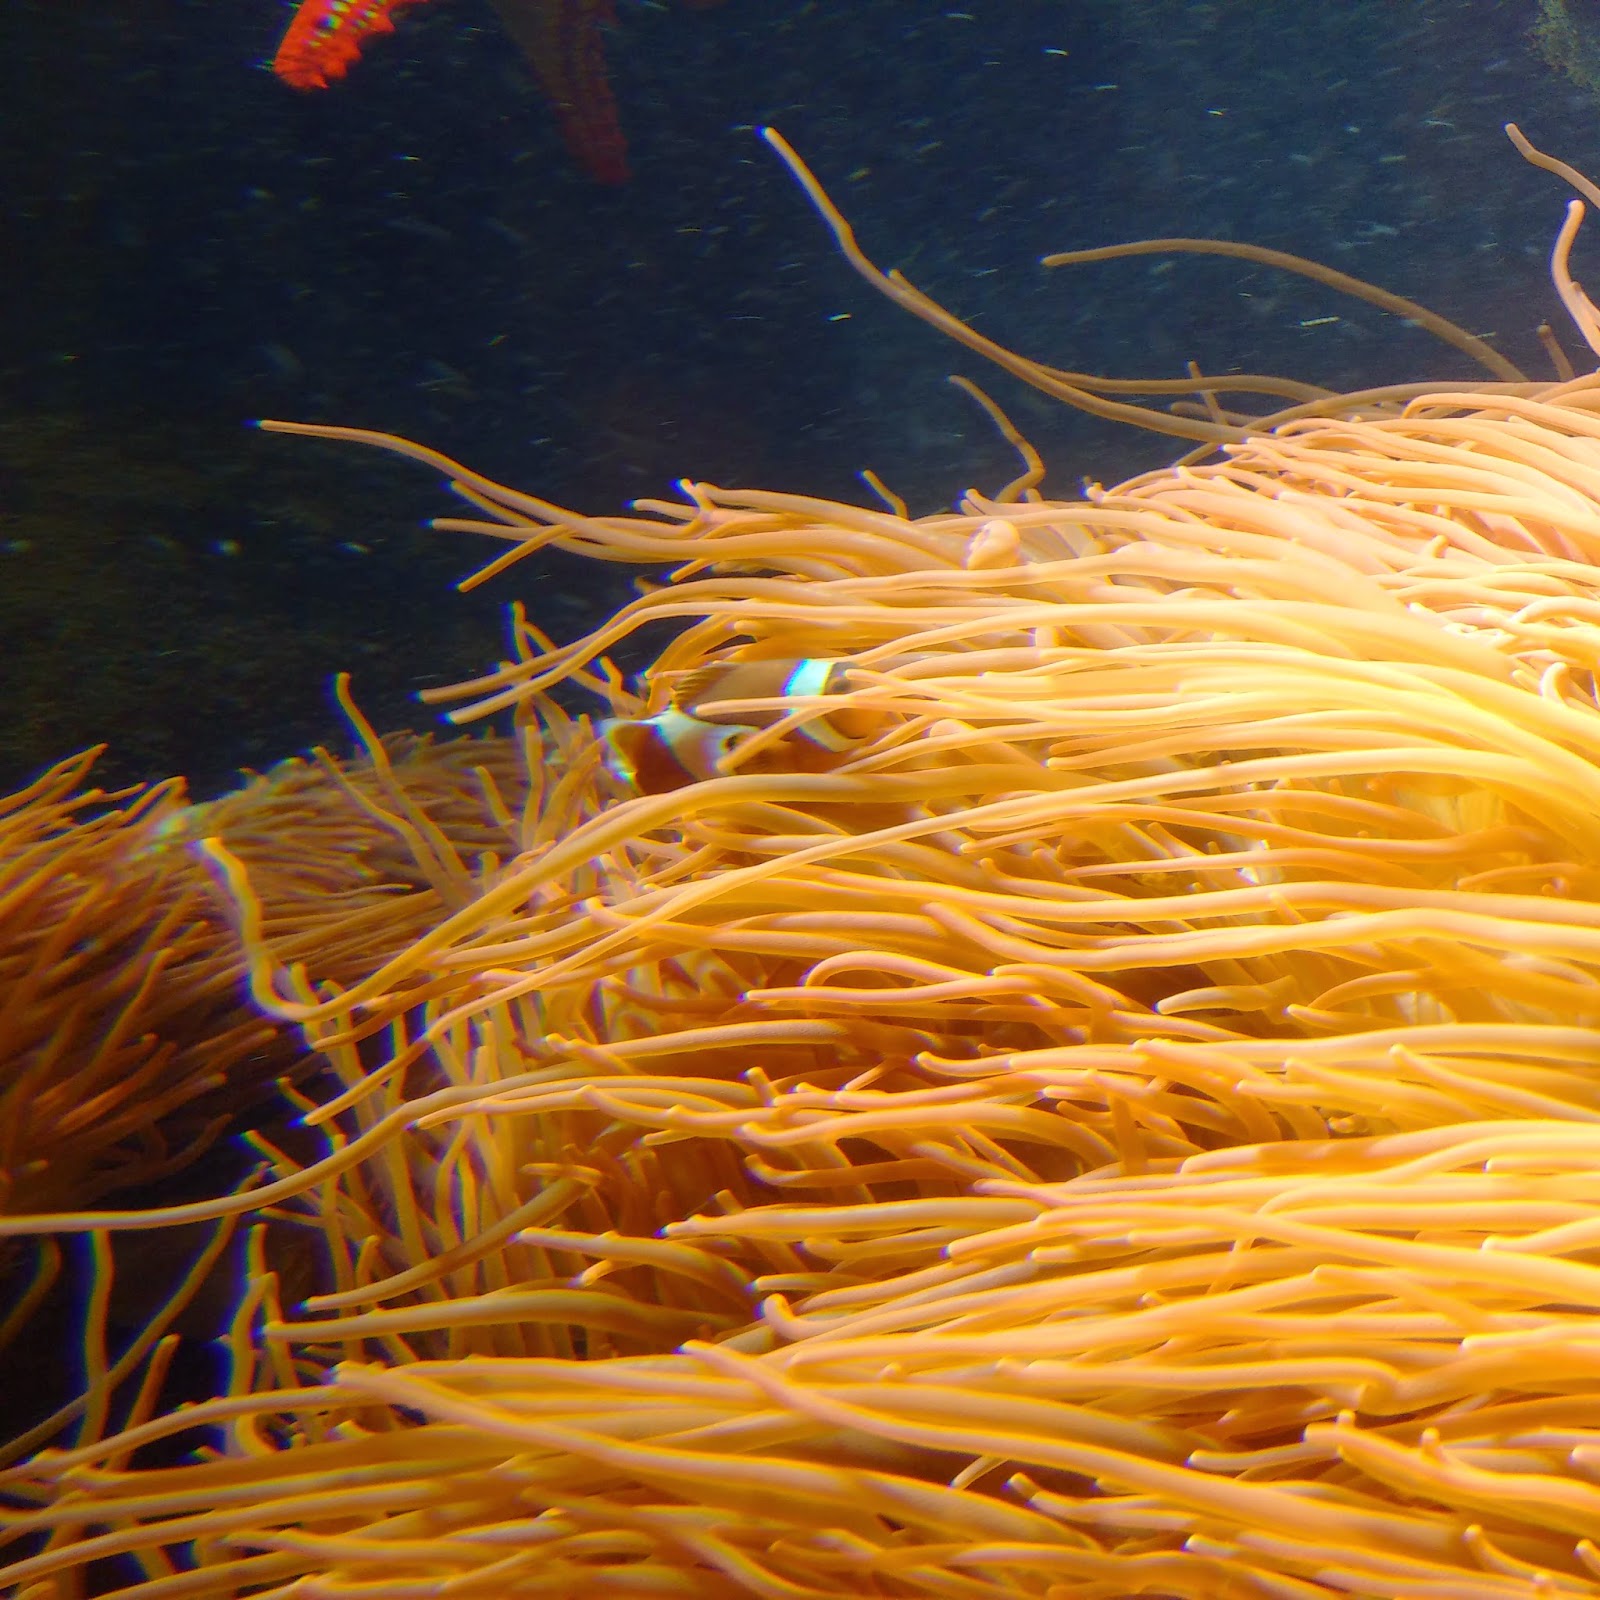
On my nails I have featured a diving penguin, jellyfish, a clownfish and a star fish. I used two shades of blue to create the base colour for this design. I painted two coats of the darker shade onto my nails and then used a sponge to dab on the lighter polish to create a gradient effect. The rest of my design was painted using nail art brushes and using nail art pens from Wah London.


Here's a couple of photos I took today of the clownfish and the jellyfish!


Thursday, 30 April 2015

Bruzz Nail Brush Review

Today I am reviewing a new nail product called Bruzz - a uniquely designed nail brush.

Personally, I never used to be a fan of using a nail brush to clean my nails because the bristles are rough and I don't want to chip or damage my nail polish after I've spent hours on a nail art design. The Bruzz nail brush is very different to any other nail brush I have seen. It has soft rubber bristles that are antibacterial and vanilla scented and the shape of the brush means there are bristles on three different angles so it cleans each side of your nail at the same time. 


I have been trying out the Bruzz for the past week now and I am really liking it! The bristles are gentle so I don't have to worry about the brush chipping my manicure and it hasn't even damaged any of the Swarovski crystals that I currently have stuck on my nails. 


I find the Bruzz really useful when I am cooking as my nails are so long it's really important to clean under my nails when I am handling food. After cooking I have been using the Bruzz with soap and water to scrub my nails - you can just add a drop of hand soap into the middle of the bristles and add a drop of water and then rub your nails across it for a deep clean. The rubber bristles can also be removed from the outer case so after using the Bruzz you can remove the inside and run it under a tap to clean it.


Overall I would definitely recommend this product if you have long nails like me or even if you have short nails but do a lot of cooking or baking! I am really impressed by Bruzz's new take on the design of a nail brush as it is easier to use and much more hygienic than a standard nail brush.

If you want to get your own Bruzz nail brush it comes in pink, blue and white colours and you can buy one from Boots and Amazon. 

Sunday, 26 April 2015

Rose French Tips

Today I tried out a new French manicure design with roses painted on the French tips. I added a silver line across the bottom of the tip and used swarovski crystals for decoration but if you don't want to add the sparkles the rose tips look great on their own for a vintage style design.


For this design you will need a white and pink polish for a French manicure - I used OPI Alpine Snow and OPI Bubble Bath. You will also need three shades of pink, a nail art brush and a green polish. Silver polish and crystals are optional.

How To Get This Look:

Start by applying a base coat.

Paint white French tips using your white nail polish brush by starting at one side of the nail and carefully painting horizontally across the tip leaving a smooth curved line that matches the natural shape of your nail tip. If the line is not smooth go back and do a second stroke of white in the opposite direction to even it out. (If you still can't master the French tip you can dip a small nail art brush in nail polish remover and use this to remove the excess white polish leaving behind a smooth line.)

Next paint one coat of a natural pink polish over the whole nail.

For the roses use a dotting tool and the lightest shade of pink to paint circles on the tips. (The circles don't need to be perfect.) 

Then, using a very fine nail art brush, use the two darker shades of pink to draw small curved lines on the light pink dots so that they look like roses. 

Now draw leaves next to some of the roses using green polish and a fine nail art brush.

Optionally, using silver polish and a very fine nail art brush, draw a thin silver line under the tip by following the shape of the white polish. Add swarovski crystals or diamantés in the middle of each nail on the silver line.

Finish by applying a top coat.